
Welcome, from sunny Australia!
My Fraser Clubman
My Fraser Clubman
 |
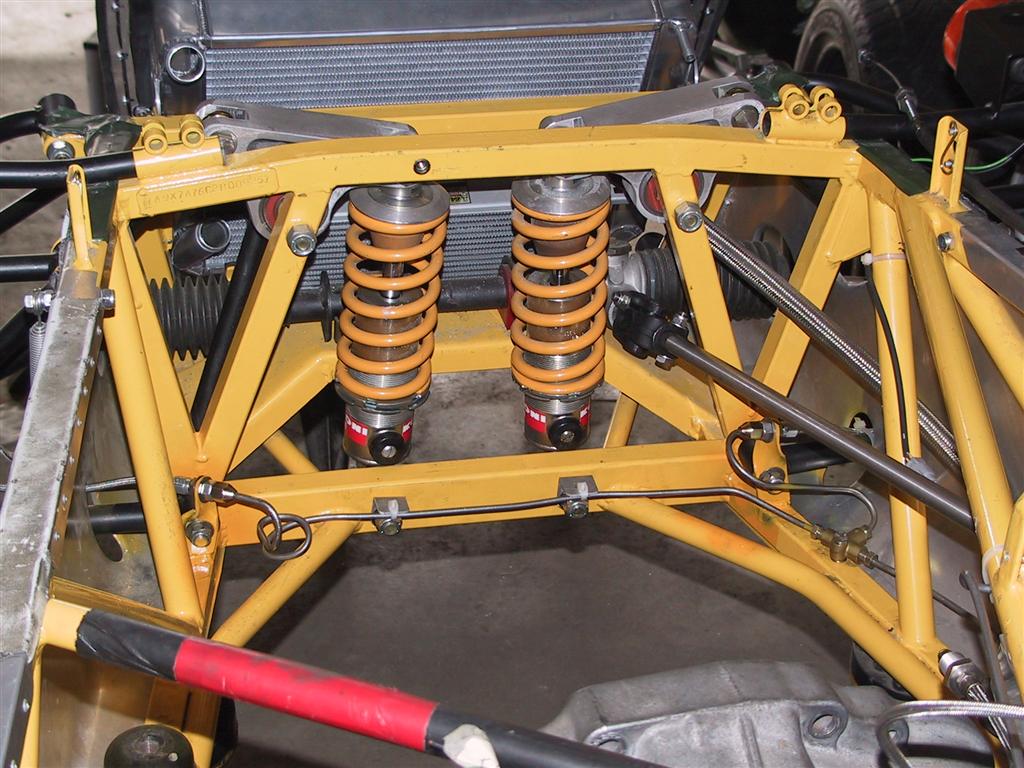
On the left is the car on the
hoist, sans engine. Most of the work was being done to set up fitting the engine, electrics, and plumbing. On the right is the front suspension, which an inboard rocker type. The car has double-adjustable Koni's all round. We also added a couple of small strips of steel on the lower suspension arms, both to put them into double sheer (for improved rigidity) and also to hang the brakes hoses off. The left-hand solid brake line ended up a bit ugly, and needs to be fixed up eventually. We also added a couple of small alloy tabs to the lower bolts on the spring assembly to also help hold the brake line in place. |
 |
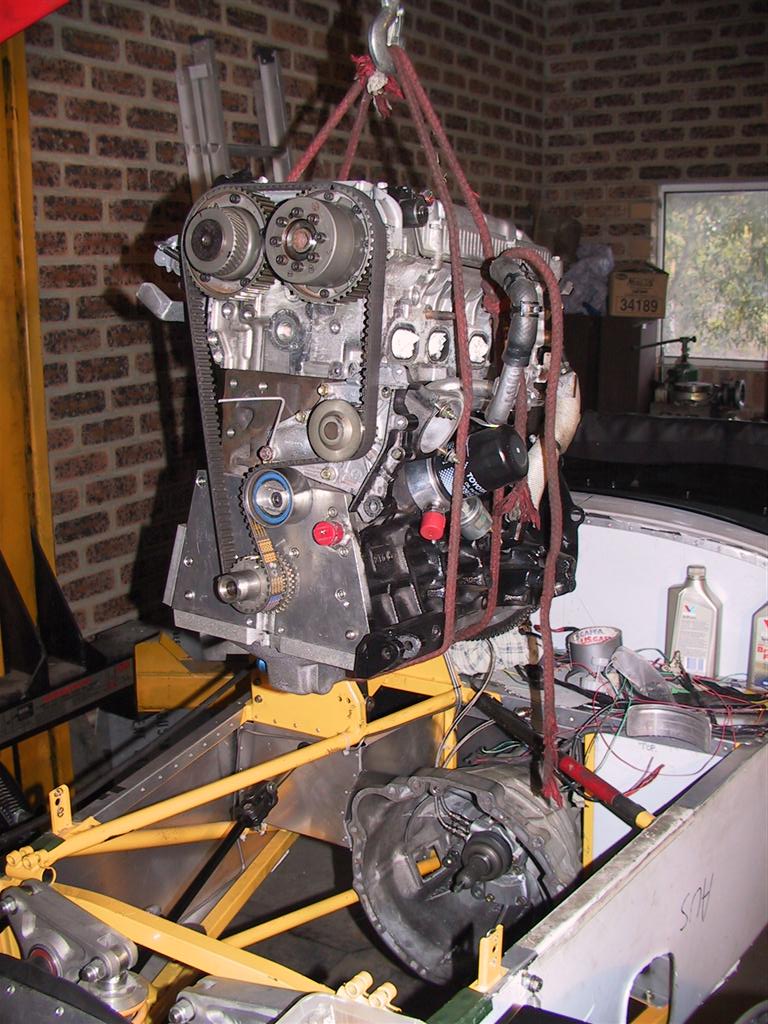 |
The engine was very hard to get
in!! It's uncomfortably longer than the distance between the front of the bell housing and the upper edge of the engine bay. (The yellow tube in the pic, behind the suspension rockers) By lifting the gearbox and allowing the cam belt to flex around we got the engine in, but for sure next time we'll fit the cam belt after the engine sits in place. On the right you can see the three belts that hang off the front of the engine. The cam belt of course, then the alternator belt, then the dry sump pump belt out in front. Getting an alternator belt the right length proved difficult to find as initially we couldn't find one less than 690mm long- We needed about 660mm - That meant it was too long and the alternator would hit the side of the engine bay, so a larger pulley was found. To make that one work, a belt 735mm long was fitted. Then when the engine was in place the larger pulley then hit the side of the engine bay. After some more head scratching I accidentally came across a belt 640mm long (not supposed to exist in most books) and it just fits in okay, with the smaller pulley. To get tension on the dry sump pump a belt almost exactly the right length had to be found, then the last little bit of tension taken up with washers under the pump to space it out just right. Back to the left picture. We also couldn't find the right length belt for the cams, so we ended up getting one that was not quite as wide as what we would have liked. When we were winding the engine over to get oil pressure, the belt started to come apart! So we did some more searching and found yet another belt that is wider but a little longer, thus there is now yet another idler/tensioner pulley on the other side of the engine. (About where the bit of wire is pointing to) Something that would normally take minutes in a regular road car took days and days on this one .... |
 |
 |
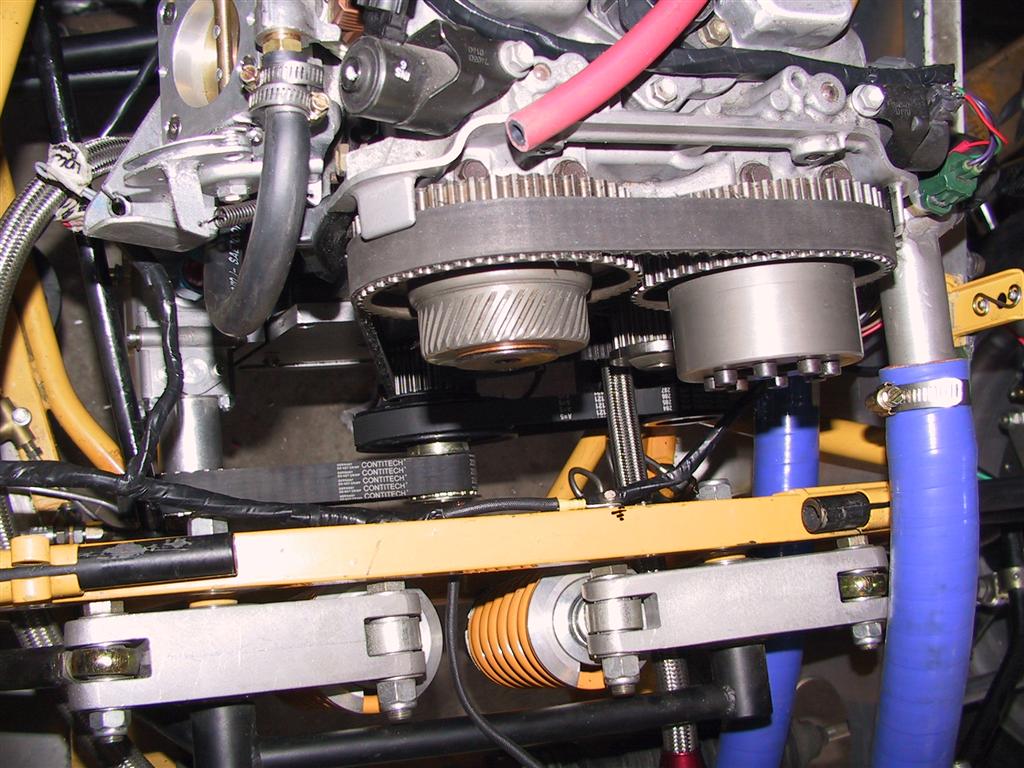
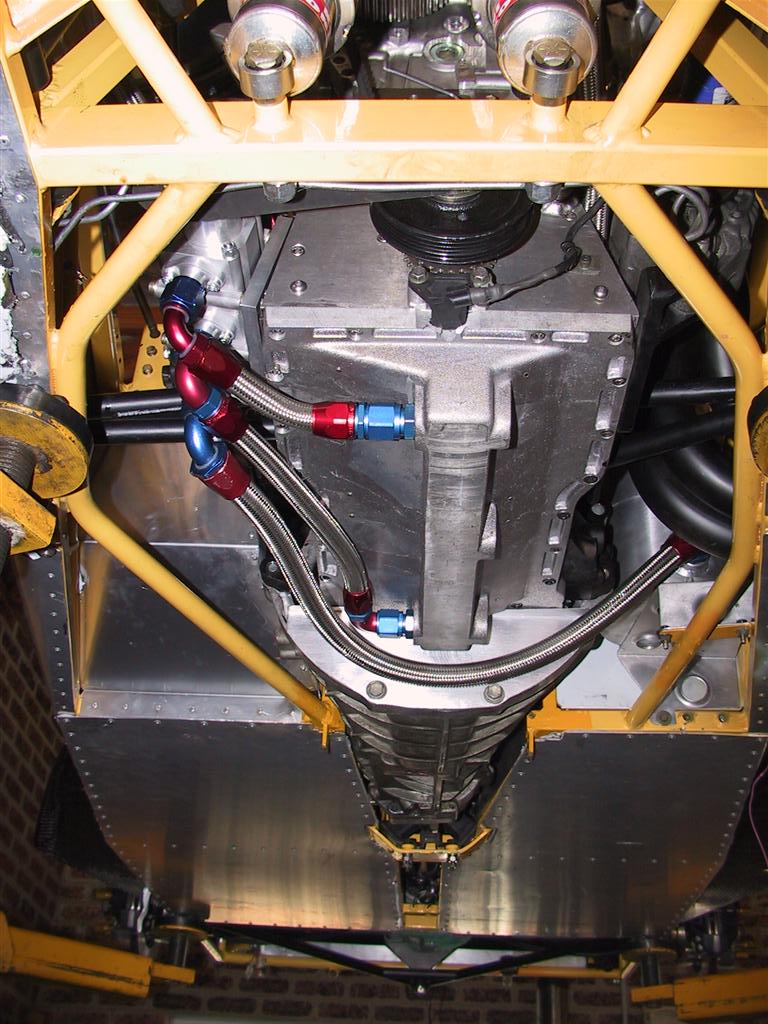
On the left is the car soon after
the engine was fitted. The dry sump tank is in place, the exhaust
pipes, and the upper radiator hose. On the right is a good picture of the dry sump setup. The front two pipes are the scavenge from the sump and the rear the feed from the scavenge tank to the pressure pump. Just under the front pulley is the crank trigger sensor, which sends an RPM signal and also a Top Dead Centre signal to the computer. |
 |
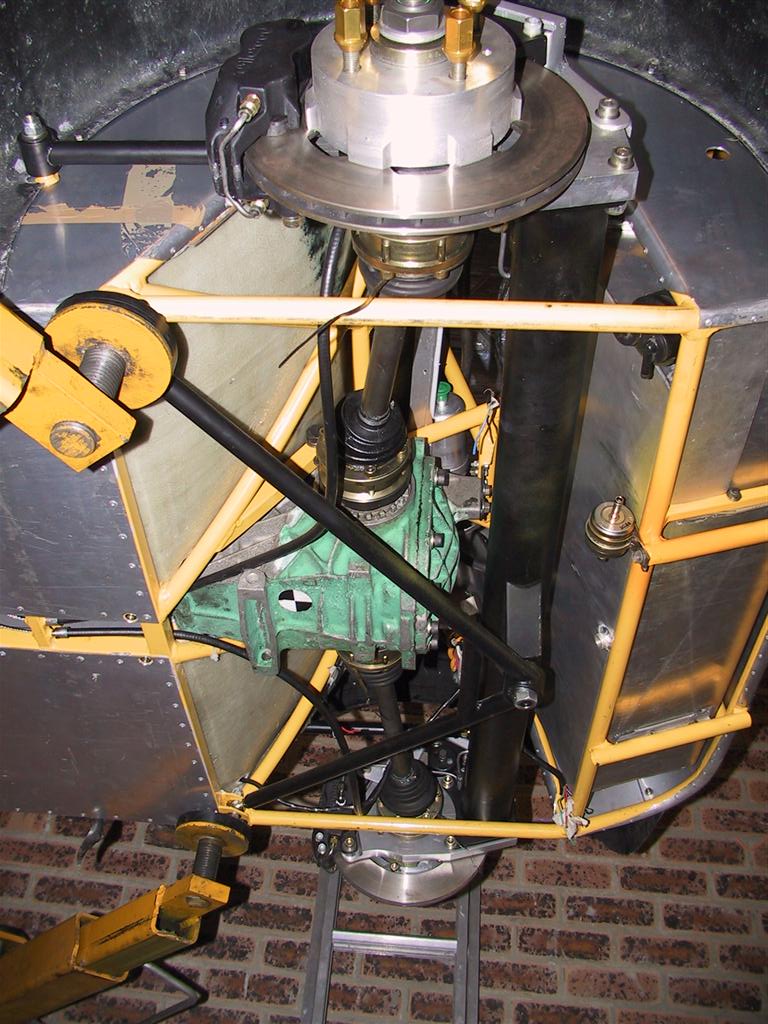 |
On the left is the de Dion rear
suspension. The diff is a Ford Sierra 7.5" and at the moment it's a 3.6:1 ratio but it'll end up with either a 3.9:1 or a 4.1:1. The LSD is a Quaife ATB, otherwise known a a Torsen Type Two. The large chunks of alloy go between the de Dion tube and wheel bearing assemblies. Small shims are used as needed to alter the toe-in & camber. Not finished in that picture is the fuel line from the middle of the fuel tank to the filter, then to the low pressure pump. On the right is the carbon dashboard sitting in place. (We haven't quite worked out how to hold it in place as of yet ....) Also, after having a look at a fair few Clubbies I decided to try to keep the panel as clean & clear as possible and so all the switches, buttons, and keys will be fittted to a centre console type panel in front of the gearstick. The Motec ADL (Advanced Dash Logger) is the same unit that's used in many top racing cars. It replaces all the other instruments that would normally clutter the dashboard. Underneath the dash is normally open on most Clubbies, but mine has hinged panels to properly hide the wiring and also make it a little more secure. (more info & pics on the previous page) Sitting on the floor on the right hand side is the Motec M400, which manages the engine. |
 |
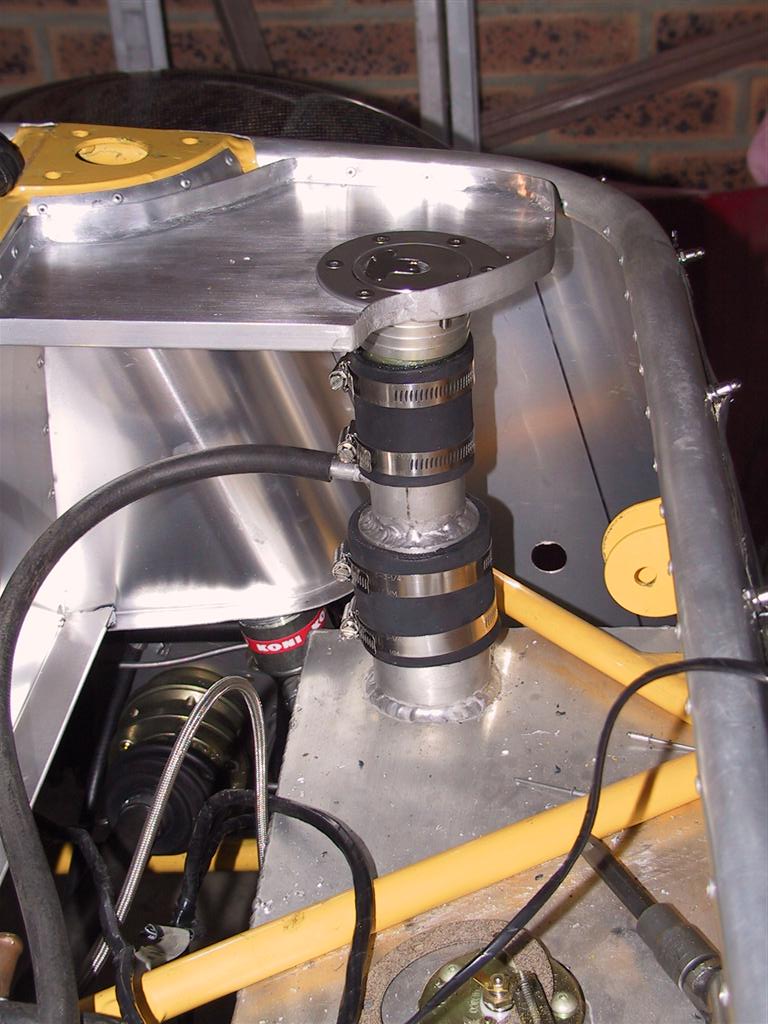 |
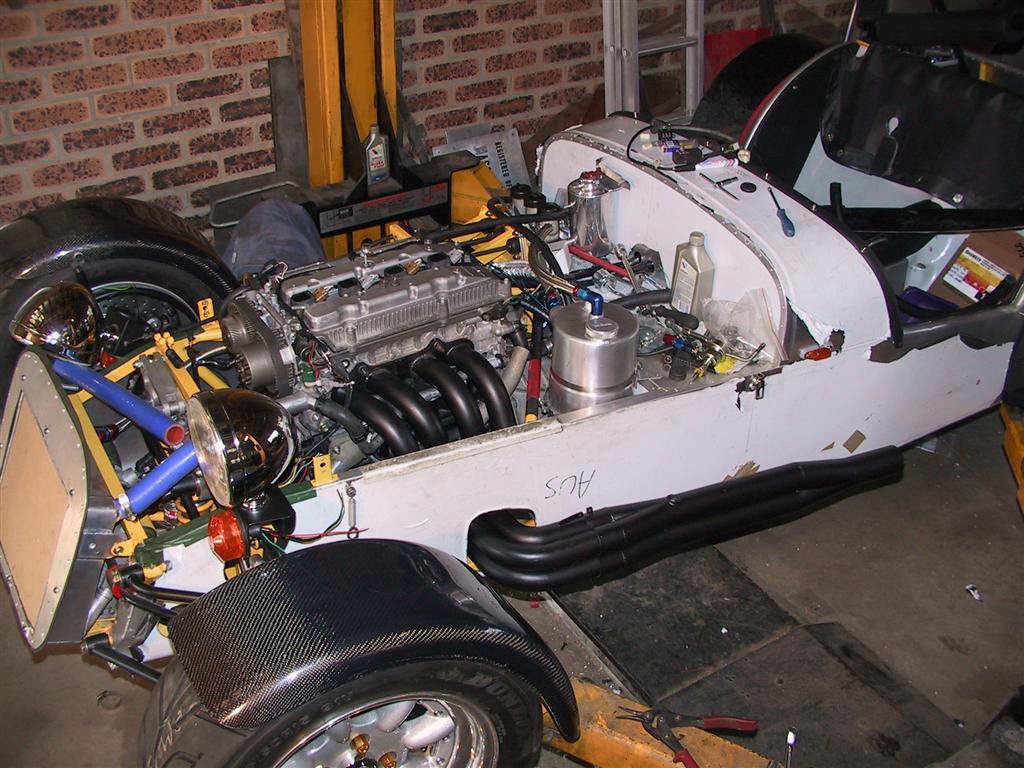
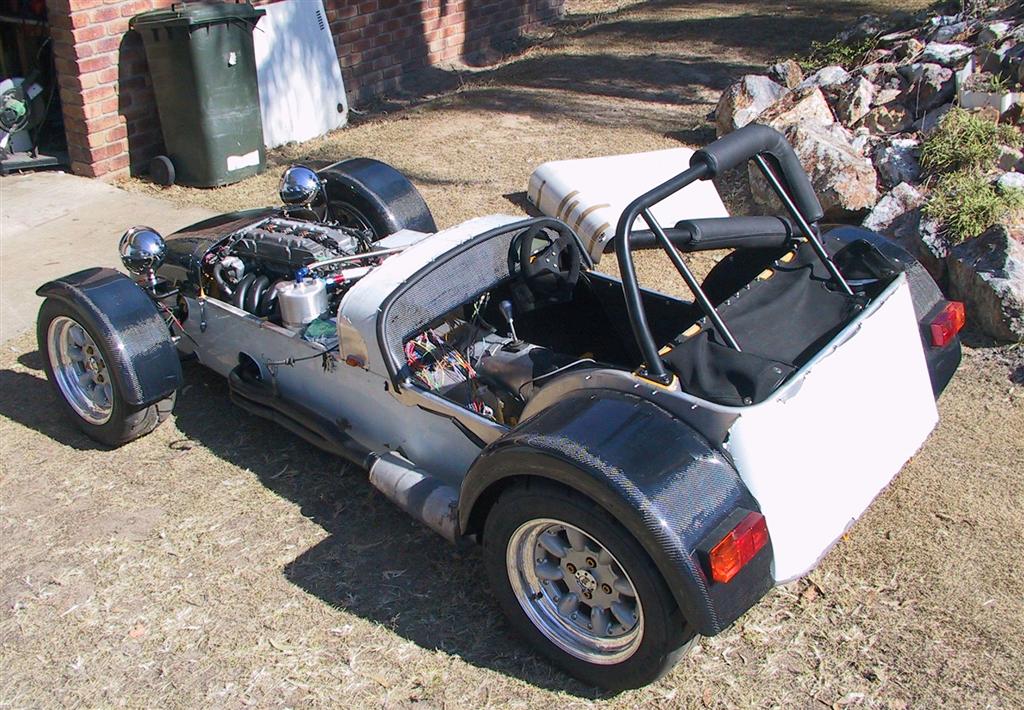
The fuel filler cap sits under the
rear cover. The return from the fuel surge tank is fed back into the
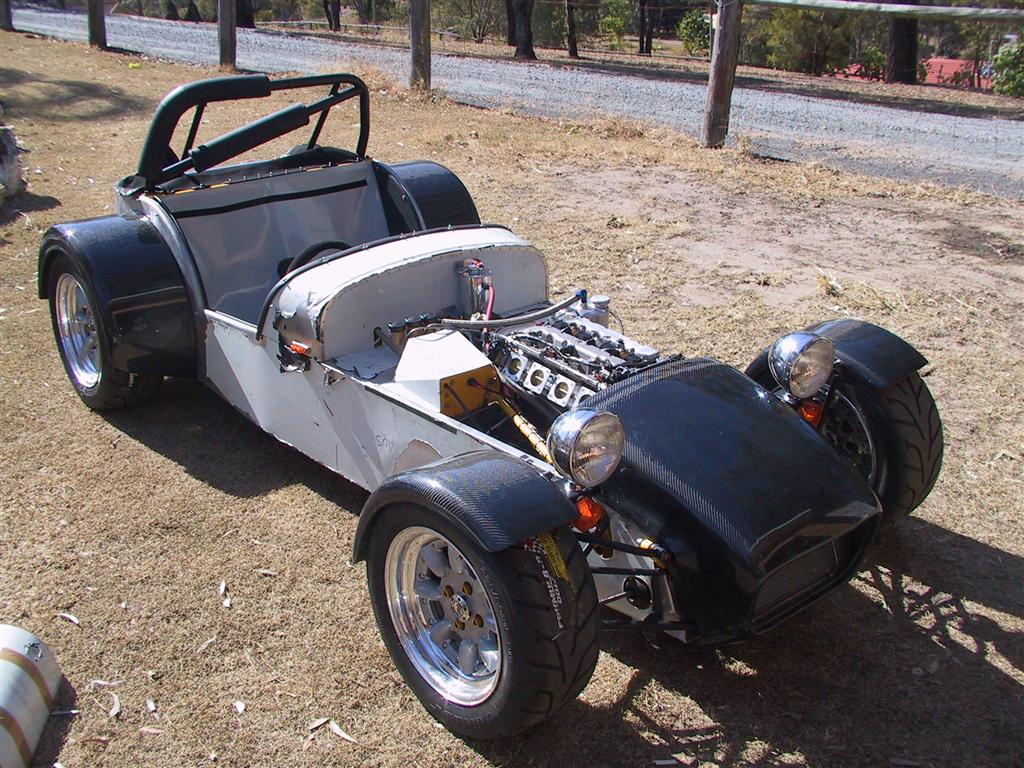
main tank through the filler neck. One problem we found was that when the roll hoop was put in place and the seat belts roughly sat in place that the one that goes over my right shoulder goes through a fair chunk of the spillage tray we built to hold the filler cap! So some mods have to be made to accomodate the belts ... On the right is the car the day before I finished holidays and went back to work. I was hoping to take it for a drive down to the end of the road & back but it wouldn't run properly so I had to miss out. The nose is now also fitted and the bonnet pretty much all set up as well. Not in that picture is the backing plate for the air box. The air box will will take up all of the space between the pedal box, the nose, and the bonnet. The front will have a hole in which the air filter will live, and from there a fibreglass air duct will go forwards (between the suspension rockers) to the panel surrounding the radiator, in which some holes will be made to let the fresh air in. |
 |
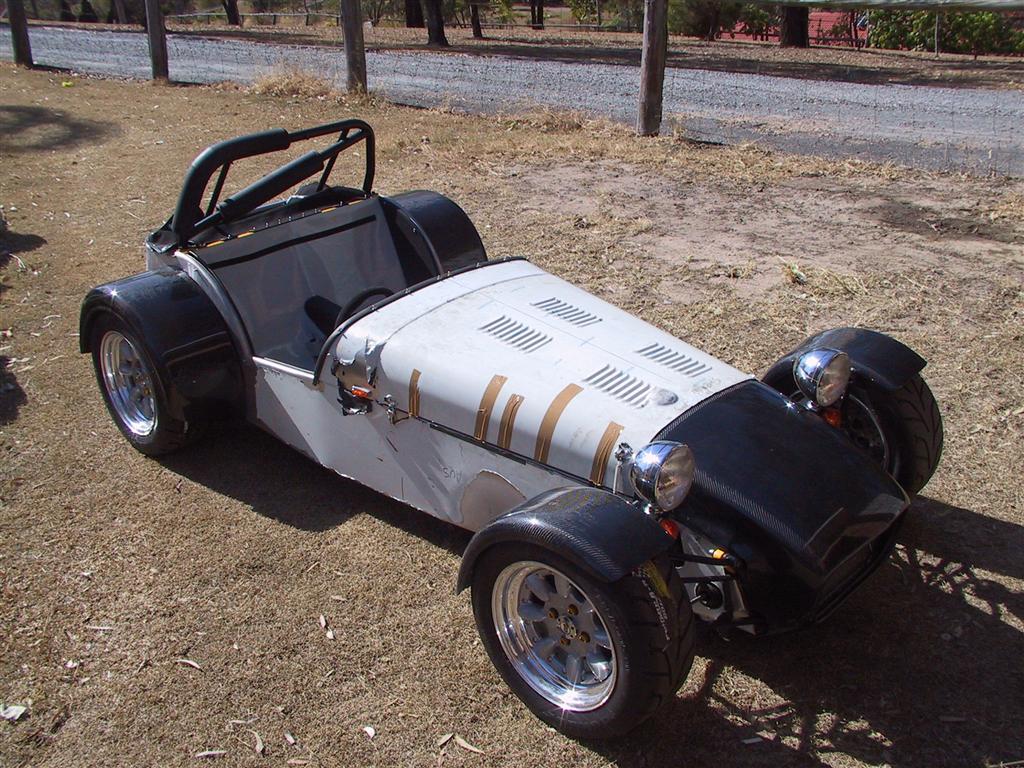 |
A bit hard to see in the picture
on the left is the bulge needed in the bonnet to clear the inlet cam
variable timing controller. It sticks up a fair bit and if you looks
carefully in the picture on the upper-right you can just see it. We
shaved as much plastic off it as we could, but we can't avoid needing a
noticable bulge. Also very obvious is the plastic coating to protect the alloy sheet metal. It all peels off quite quickly. The muffler seen hanging off the end of the exhaust on the right is just to make it a bit quieter for running inside the garage & down the road. It's not staying. There's also not a great deal of clearance between the cam pulleys and the nose, but there's just enough to clear. |
 |
Back to the Index page
Page & contents where applicable © Bill Sherwood