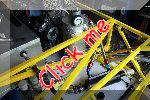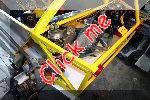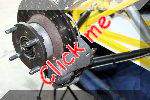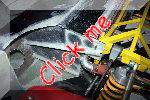
Godzone!
Welcome from sunny Australia!
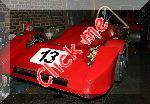
My Racing car

In November 2006 my Dad & I took the car down to Oran Park in Sydney for the National Championships.
In the previous two times I've been there, I've had bad luck and it happened again - I qualified 1st in class by a long way, but on the start line for the first race when I dumped the clutch the wheels - instead of spinning - gripped and the diff housing twisted upwards, the pinion flange ripping a small hole in the panelwork just under my left arm, and the then gearbox output shaft broke.
I managed to get a short video of the car in qualifying though, seen here on Youtube.

There was a lot of damage, and I've decided to rebuild the car properly as it's getting very daggy and ragged-looking - this page documents its rebirth, of sorts.


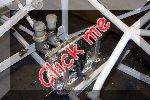
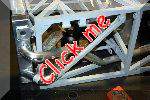
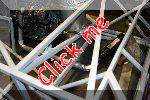
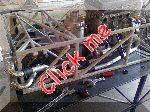
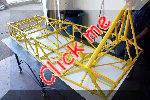
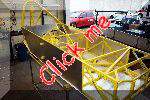
Here's a good example of how tired the car was. The floor had been hammered very badly and was worn through in some places, and was scratched badly almost all over. On the right you can see how cluttered the engine bay was around the front-left corner - Have a look at the later photographs and you'll how much neater it is and the extra space the car now has in that area.
In the quest for more power, we fitted the engine with Mikuni flat-slide carburetors. They certainly gave the good on the dyno, with the car making more power than it ever has before and the dyno operator saying that it's the most powerful one he's ever seen. But the mixtures were all over the place and it didn't look good below about 5,000rpm as the mixtures were far too rich.
However, we think they're the way to go so when the time comes the engine will go on the dyno and we'll cure all that.
One of the other problems is that the Mikuni's need a lot more spring tension for throttle return and I couldn't heel & toe properly at Oran Park. So more mods to the accelerator will be made as well. It's only got a very small amount of travel at the moment so it should be easy to cure.
On the left is the remains of the output shaft of the gearbox. It sheared clean in half!
On the right, you can see the partly-repaired rear suspension front  mounts on the left-hand side. The upper one was nearly ripped completely out of the chassis. We'll have to give them some better bracing, in double-shear with the repair. The lower-right trailing arm bent so far down that the middle of it hit the ground and it has good scrape marks on it.
The alloy panels are off the sides of the car now so such repairs - and any other mods - are fairly easy to do.

There's a lot of other little mods I want to do as well to improve the car, and to make it a bit lighter and easier to work on. I want to replace the heavy copper-core radiator with an alloy one, and duct all the airflow from the nose through it, rather than have 1/3 of the air go around it and to the oil cooler. I want to replace the conventional oil cooler with a water/oil intercooler, as this will simplify the oil plumbing a great deal. It will also help control the oil temperatures a lot better.
The footwell panelling is also very hard to get in & out, so I want to make that a lot easier.


April - May 2007
With the 2007 Nationals later in the year and me not being a great fabricator, and having a friend who is a great fabricator, I decided to take the car to his local workshop to get as much work done on it as quickly as possible. And to make some changes that I've wanted to for a while. Peter Butler from Butler Metalcraft on the Gold Coast is the fellow, and he's an excellent engineer that I've learned a great deal from. This is a series of photos of our work on the car over about a month.

One of the things I've wanted to improve is the anti-Ackerman effect that the steering has. We couldn't eliminate it, but we reduced it a lot by moving the rack forwards as far as possible. In the combined photo on the left you can see how we cut the old upper supports for the rack to see how it looks further forwards. The angle of the steering links is somewhat reduced, and in the final position of the rack it was a little further forwards yet again. The rack mounts are also far stiffer than before, as you'll see below.
The chassis uprights where the rear suspension trailing arms attached to were removed and replaced by a much larger section of rectangular tube, 20mm x 50mm. That in itself would probably be strong enough but as you'll see below I also added a couple of small braces to make sure.  The old tubes were damaged beyond practical repair anyway, so something had to be done. We also changed the orientation of the bolts from across the chassis to vertical, as this should be stronger.
Here you can see the stronger rack mounts, and also the lower control arm pivots now have a much better arrangement of double-shear. It's a little heavier but much stiffer so worth it. Highlighted in red are the new tubes. On the right is a couple of weeks later and you can see the rack in place, and also the steering column has been raised a lot so I can now get my left foot onto the brake pedal - I couldn't do that before.
Underneath the rear of the car are a couple of diagonal braces that go out to the rear corners to support the lateral forces the diff housing generates when cornering. The original ones were quite light and the tubes not straight, so we replaced them with much stiffer straight ones, and while the weight should be about the same the rear end will be a lot stiffer.
The old tubes are highlighted in red in the left photo.
This is the rear suspension mocked-up to check the diff housing is in the correct position before welding the brackets onto it. Also note the horizontal fitment of the Watts Link. This is to make the rear roll centre low and also keep it in the correct relationship with the front roll centre for good handling. The big bolt that holds the Watts Link is in single shear but it's otherwise very stiff.
This is the outer end of one of those tubes and you can see how it attaches to the diagonal tube. True enough it's far from the best way from stopping any twisting action, but it's vastly better than what it had before.
The left-hand diagonal tube also was bent to hold the fuel tank rear mount, and that has also been removed now as we worked out a lighter and better way of mounting the fuel tank.
To see how to repair some of the chassis we had to fit the engine and gearbox, and so here's a photo of the underneath of them, something you'd normally never see in place. You can see how much of the bell housing has been cut away to let the gearbox & engine sit lower in the car. The ring gear on the flywheel is very nearly the lowest point of the unit.
You can also see the cover plate that goes on the bottom of the gearbox and how it's finned - Those fins also extend inside the gearbox and are covered with oil, and so there's a lot of surface area to help dump heat. But because the gearbox is so low in the car, part of the fins have to milled to clear a couple of chassis tubes. There's less than a millimetre clearance there, but because the engine & gearbox are quite solidly mounted they hardly move that far.
Here's a good photo of how we made the new mounts for the front of the rear trailing arms. You can also see the extra little tube I added. It's very stiff and should give no further problems.
On the right is the new brackets for the diff housing, and a mock-up of it all at ride height to get the angles right. The rear bolts of the trailing arms are now also in double-shear, and again much stronger than before.
While the chassis doesn't have to be all that stiff behind the rear suspension mounting points, it still have to support the forces that the rear springs generate and also the lateral forces from the Watts Link on the diff housing. We had a look at it all and decided that while what was already there was adequate, with a little more work it could be considerably better. We'd  already replaced the diagonal tubes that take the lateral forces, and I added four more tubes that help support the rear of the car both vertically and laterally as well. They too add a little weight, but I think the overall increase in chassis stiffness will be well worth it.
You can see the new tubes highlighted in red in the photo on the left.
We also took the time to brace the diff housing to try to reduce the change in toe-in/toe-out under heavy acceleration/braking. A very rough test showed that all that extra tubing on the back of the housing maybe made it about 20% stiffer so that's a little disappointing, but still an improvement. I may change it yet again to try to make it stiffer but without adding more weight.
I ordered a nice new lightweight alloy radiator from PWR Radiators on the Gold Coast. It weighs a lot less than the old copper one, but has quite a bit more surface area as I got them to make it wider & taller. I will be ditching the old air-to-oil cooler and using a Setrab water-to-oil intercooler so the water radiator now has the additional task of cooling the oil. But since the old radiator had to made room on one side to let air past to get to the oil oil cooler, I used that space to make the new radiator larger. I also used up the wasted space between the old radiator and the upper nose skin, and some wasted space on the bottom.
On the right is the new brake switch - The old one was quite large, heavy, fragile, cumbersome, and tended to leak a little. The new one will simplify that area a lot.
Peter is also making me a superb new set of pedals & a pedalbox. We moved the chassis tube that the old pedalbox mounted on, that my heels rested on and moved it forwards to give me a little more room. In the pursuit of strength and weight-saving, the brake pedal is made from steel and the clutch & accelerator from alloy.

More to come when I am able to get back to work on it in September.


Time for an update, albeit quite some time after the race in November 2007.
On the left is the new mounting for the oil scavenge pump, fitted to the side of the engine to make it more rigid and save a little weight. On the right is the new pedalbox and pedals. The link to run the clutch cable off has been fitted and also a small bracket to mount the front brake t-piece onto, sitting on the chassis tube just in front of the front brake master cylinder.
Another major change I made was to the water plumbing. The original was pretty tightly wedged into the engine bay and hard to get out when working on the car. It was also pretty unweildy so I decided to make the water pipes run far more neatly and be easier to get out of the car. To do this, we made some connections on the end of the radiator and in a few other places, so the long pipes would come out in a few pieces. I decided to run the hot return water on the other side of the engine, down the exhaust side, as there was far more room. The cold water pipe from the radiator also ran through the oil/water heat exchanger, which fits nearly in the empty space behind the radiator. The new pipe going into the back of the water pump is also hugely neater than the old one. Instead of being crowded up against the starter motor, there was just enough room to take it down inbetween the engine mount on that side.
On the left you can see the rubber joins in the hot water return pipe, to allow it to be removed from the engine bay with the engine still in place, and also remove the engine from the car with only a one rubber join undone on that side.
On the right you can see the long run down the back of the engine that pipe makes, and to help support it, we welded a small tag onto it and it goes under a bell housing bolt to stabilise it all.
There's also the new oil tank mounts, again to simplify things and make it easy to remove. The chassis was also sand-blasted and coated with an anti-rust paint.
If you look closely you can also see the simple radiator mounts we came up with. There's two on the left and one on the right, to allow the radiator to flex around a bit if it needs to.
I had to come up with new footwell panelling, as the old one was pretty poor and very hard to work on. It took a lot of sitting around and thinking about it, but the end result was well worth it. The panels are thin aluminium and can be totally removed from the car in a couple of minutes. The panels are held in place with small Nutserts, and they lock together to make a strong unit. The top cover is also held in place with Nutserts, but the long side closest to the engine slides into a slot in the top of the vertical panel, again to make it fast & easy to get into the footwell.
On the left you can see how the big vertical panel joins around where it intersects the top part of the engine mount.  With a little alloy sticky tape, it all holds together very neatly an is fuel/oil proof.
On the right is the new backrest panel. The old panel was made up from two or three separate parts, and so a lighter & simpler single-piece one was made. Also in that photo you can see the two little tabs welded onto one of the chassis tubes with the holes in them - they are the new fuel tank mounts, and again they are far more simple and lighter than what it used to have. It'll also let the tank move a bit if there's a crash, and not be bent and spit, and so let fuel out.
Like the Fraser, I decided to make the chassis a little more eye-catching, and so it too is painted YELLOW now. I did the painting, and I discovered I'm not very good at it! But multiple coats covered multiple sins, shall we say. On the left is the freshly-painted chassis sitting on the new floor panelling. Unfortunately the only suitable alluminium panel I could get had a white coating, so that's how it now looks. Well, the oil leaks show up quickly .....
On the right are the new side panels, and unlike the old panels they aren't full of holes to let the hot engine bay air out.
On the left is the completed brake & pedalbox assembly. The new pressure swtich fits in very neatly, though to get the brake line from the master cylinder to the t-piece I had to use an odd-shaped fitting to bring the line under the master cylinder to make it all work.
On the right, the engine slotted in nicely, with the new scavenge pump position working well. The only hassle is getting the scavenge line from the sump to the pump as the angles & distance don't leave a lot of options. We ended up re-using the old line, but it wasn't good and after the race I changed it for a much better solution - photo to come.
Nearly there!  On the left there's lots of little things that I've done - On the top of the footwell box there's a rubber strip for the Mikuni carbies to rub on, if need be. You can also see how the cold water pipes run across the front of the car, and how the oil lines go to/from the heat exchanger. The mounts for the oil tank are done, and because the tank fits in so neatly all it needs is a few cable-ties to hold it firmly in place.
On the right is how the diff slots into the back of the car, leaving just enough room for it to move around and not hit anything.
There seemed to be enough spare time to do some extra work on the brakes, so I bought a pair of AP Lockheed lightweight racing calipers for the front, saving a full 4kg from the car because the old calipers were Mk1 Cortina and made from steel. The original brakes lines pretty much bolted straight-up, which made a pleasant change from all the other difficult modifications done on the car.
On the right is the new all-glass nose, which also weighs quite a lot less than the old nose and is far more rigid, and also makes more downforce. You can see the alloy plates bonded to the sides and that's how it attaches to the car. In early 2008 we welded some nuts to the inside of the support tubes so the bolts are also far easier to fit than the old nose.
This is the last photo of the car I took before the race meeting. I quickly threw it together to see how it looks with the newly-painted engine cover and nose.

So how did the race go?

On the right is the once-again broken gearbox mainshaft ...... read on below as to what happened.
After putting in rather a lot of work to get the car ready, (incuding a fair few 12 - 15 hour days in the last week or so) it was finally done. Not quite finished enough to suit me, but good enough to race with. So on the trailer and off to Morgan Park out at Warwick it went. Throughout the weekend it absolutely bucketed down, and although I really wasn't too keen on running what was basically a brand-new car around a totally unfamilar track in a monsoonal downpour on untried wet tyres, it had to be done to qualify the  car.
So out I went, and set the pole time for my class (not many cars were there though) even though it wasn't very nice at all to drive in the wet - The clutch wasn't adjusted properly so I couldn't get it into gear from a standing start and so had to start it in-gear, thus making starting it difficult. And start it a few times out on the track is what I had to do, as it really liked to spin.
Anyway, after doing enough laps to get what I could out of the car I came into the pits, and as the car slowed the engine gradually sputtered to a halt. After much cranking it finally got going again and when I let the clutch out the all-too familiar BANG was heard, then there was no drive.


The Repair Mk2

We decided to get a properly made mainshaft made up, and also get a good dyno-tuner friend of ours to get the Mikuni's right as well. Also during the short drive I found that despite much sitting in the car when rebuilding it to get the pedals just right, they weren't - The brake pedal was far too soft and so far too much travel, and my foot got caught on the side of the throttle so it was almost impossible to heal & toe well. I've changed the front brake master cylinder to a larger one and the pedal stiffness and travel now seems to be back to where it was. I also removed a large chunk of the side of the throttle pedal footpad and that should give me enough space.

That's the brand-new gearbox mainshaft and on the right is the new yoke. The new shaft is much thicker than the old one, and is of course a single-piece unit so it's much stronger. We think that another part of the problem of the old shaft failing was the new rubber front joint we added to the tailshaft. It's pretty stiff and we think it put excessive loads on the back of the gearbox, so it's being changed for a regular uni-joint again. The yoke will also now not run in a brass sleeve, but a pair of roller bearings. The bearing will run a further-modified exension housing on the gearbox.
It's late April 2008 as I type this, more to come in the next few months ...


June 2009
Okay I'm lazy and haven't done a page update for a long time ....
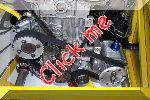
With the new & much stronger mainshaft going into the gearbox, we also improved the rest of it. The extension housing had the end cut off and was refitted with a new alloy tube that holds two roller bearings. Because the bearings need more oil than the original bronze bushing we welded two small tabs onto the 1st gear synchro ring, as that will splash oil around quite well enough.
On the left you can see the new alloy tube and roller bearings. Since the oil would get slashed around in one direction only, the tube was fitted with a splash barrier and it is made to drain the oil down through a groove then a hole into the tube, where it then lubricates the roller bearings.
On the right you can see an original factory K50 gearbox extension housing, and our somewhat modified one next to it. You can see just how much shorter it is, and it needs to be that short so the car can have a tailshaft of a reasonable length.
While the gearbox was being finished, the engine was run on a dynomometer to get the Mikuni flat-slide carburetors sorted out. Gary Stuart of Brisbane did a superb job on getting them right, and so we finally had the mixtures very close to being spot-on throughout the rev range and through most throttle settings. It involved modifying the carbies so they had some extra jets fitted and this was the magic fix that cured the lean/rich problem they had before. If you look carefully on the left-hand photo you can see them sticking out of the carby body, just behind the foam air cleaners and they had a rubber tube coming out of them.
The engine ran flawlessly and the testing also showed that the oil/water heat exchanger we'd added was doing a great job.
The dyno machine itself has a bit of history - It was originally owned by Bo Seton, father of Glen Seton, and he raced Aussie touring cars in the 60's & 70's and also built Glen's early V8 Supercar engines. We bought the dyno off the chap that bought it off Bo, and since we ended up not being able to use it we sold it to Gary.
Here's a short video of the engine being run-up on the dyno. It doesn't sound very impressive as the engine only runs to 8,000rpm due to the class-imposed rev limiter. But it makes good power and does it over a wide range of revs, and that's all we want.


So after yet another few months of a lot of work, the car was ready to go again - then two days before we were due to head south to Oran Park our tow car, a Mitsubishi Pajero, had the gearbox break!  A few quick panicky phonecalls and cash swapping hands and the Pajero was fixed late the next day. After driving it back from the repair shop, the next time it would drive was towing the racing car's trailer down to Sydney.
Anyway the racing car looked great, never been better. It still hadn't been tested - ran out of time - but I was confident that it would run well enough to at least finish some races. It was the fourth trip to Oran Park and in the previous three I'd never got past the start line so the goal of the trip was not so much to win a race, but just FINISH one! Anything extra was a bonus.
And I finished qualifying and all three races - whew!
The car was not trouble-free though, there was two oil leaks (one from the scavange pump and the other from the rear of the engine), the brake lines leaked fluid, the pedal box was too flexible, the rear ride-height was too low, I couldn't used 1st gear off the line due to selection problems, the carbies would run out of fuel in sustained right-hand corners, and other minor problems that prevented me from really pushing the car.
But I got the finish all my races with my last run at Oran Park, before it's dug up to put houses on.
The car was quick in a straight line, but I couldn't really lean on the brakes as much as I'd like to have due to the fluid leak & pedal box problem. Though the pedal effort & travel was vastly better than it was at the previous meeting.
The car would often three-wheel around some corners, with the inside-front just lifting clear of the ground. Whilst it looks good, it's better to have it on the ground and this is one of the problems I have to sort out before the next meeting.
But the car demonstated that the engineering is sound, it just needs a little fiddling to get everything right.
(And the driver needs some better brave pills!)


  Back to the Car Index page

Back to the Index page

Page & contents where applicable © Bill Sherwoo